Quickstart Guide

DexTraderPro getting started

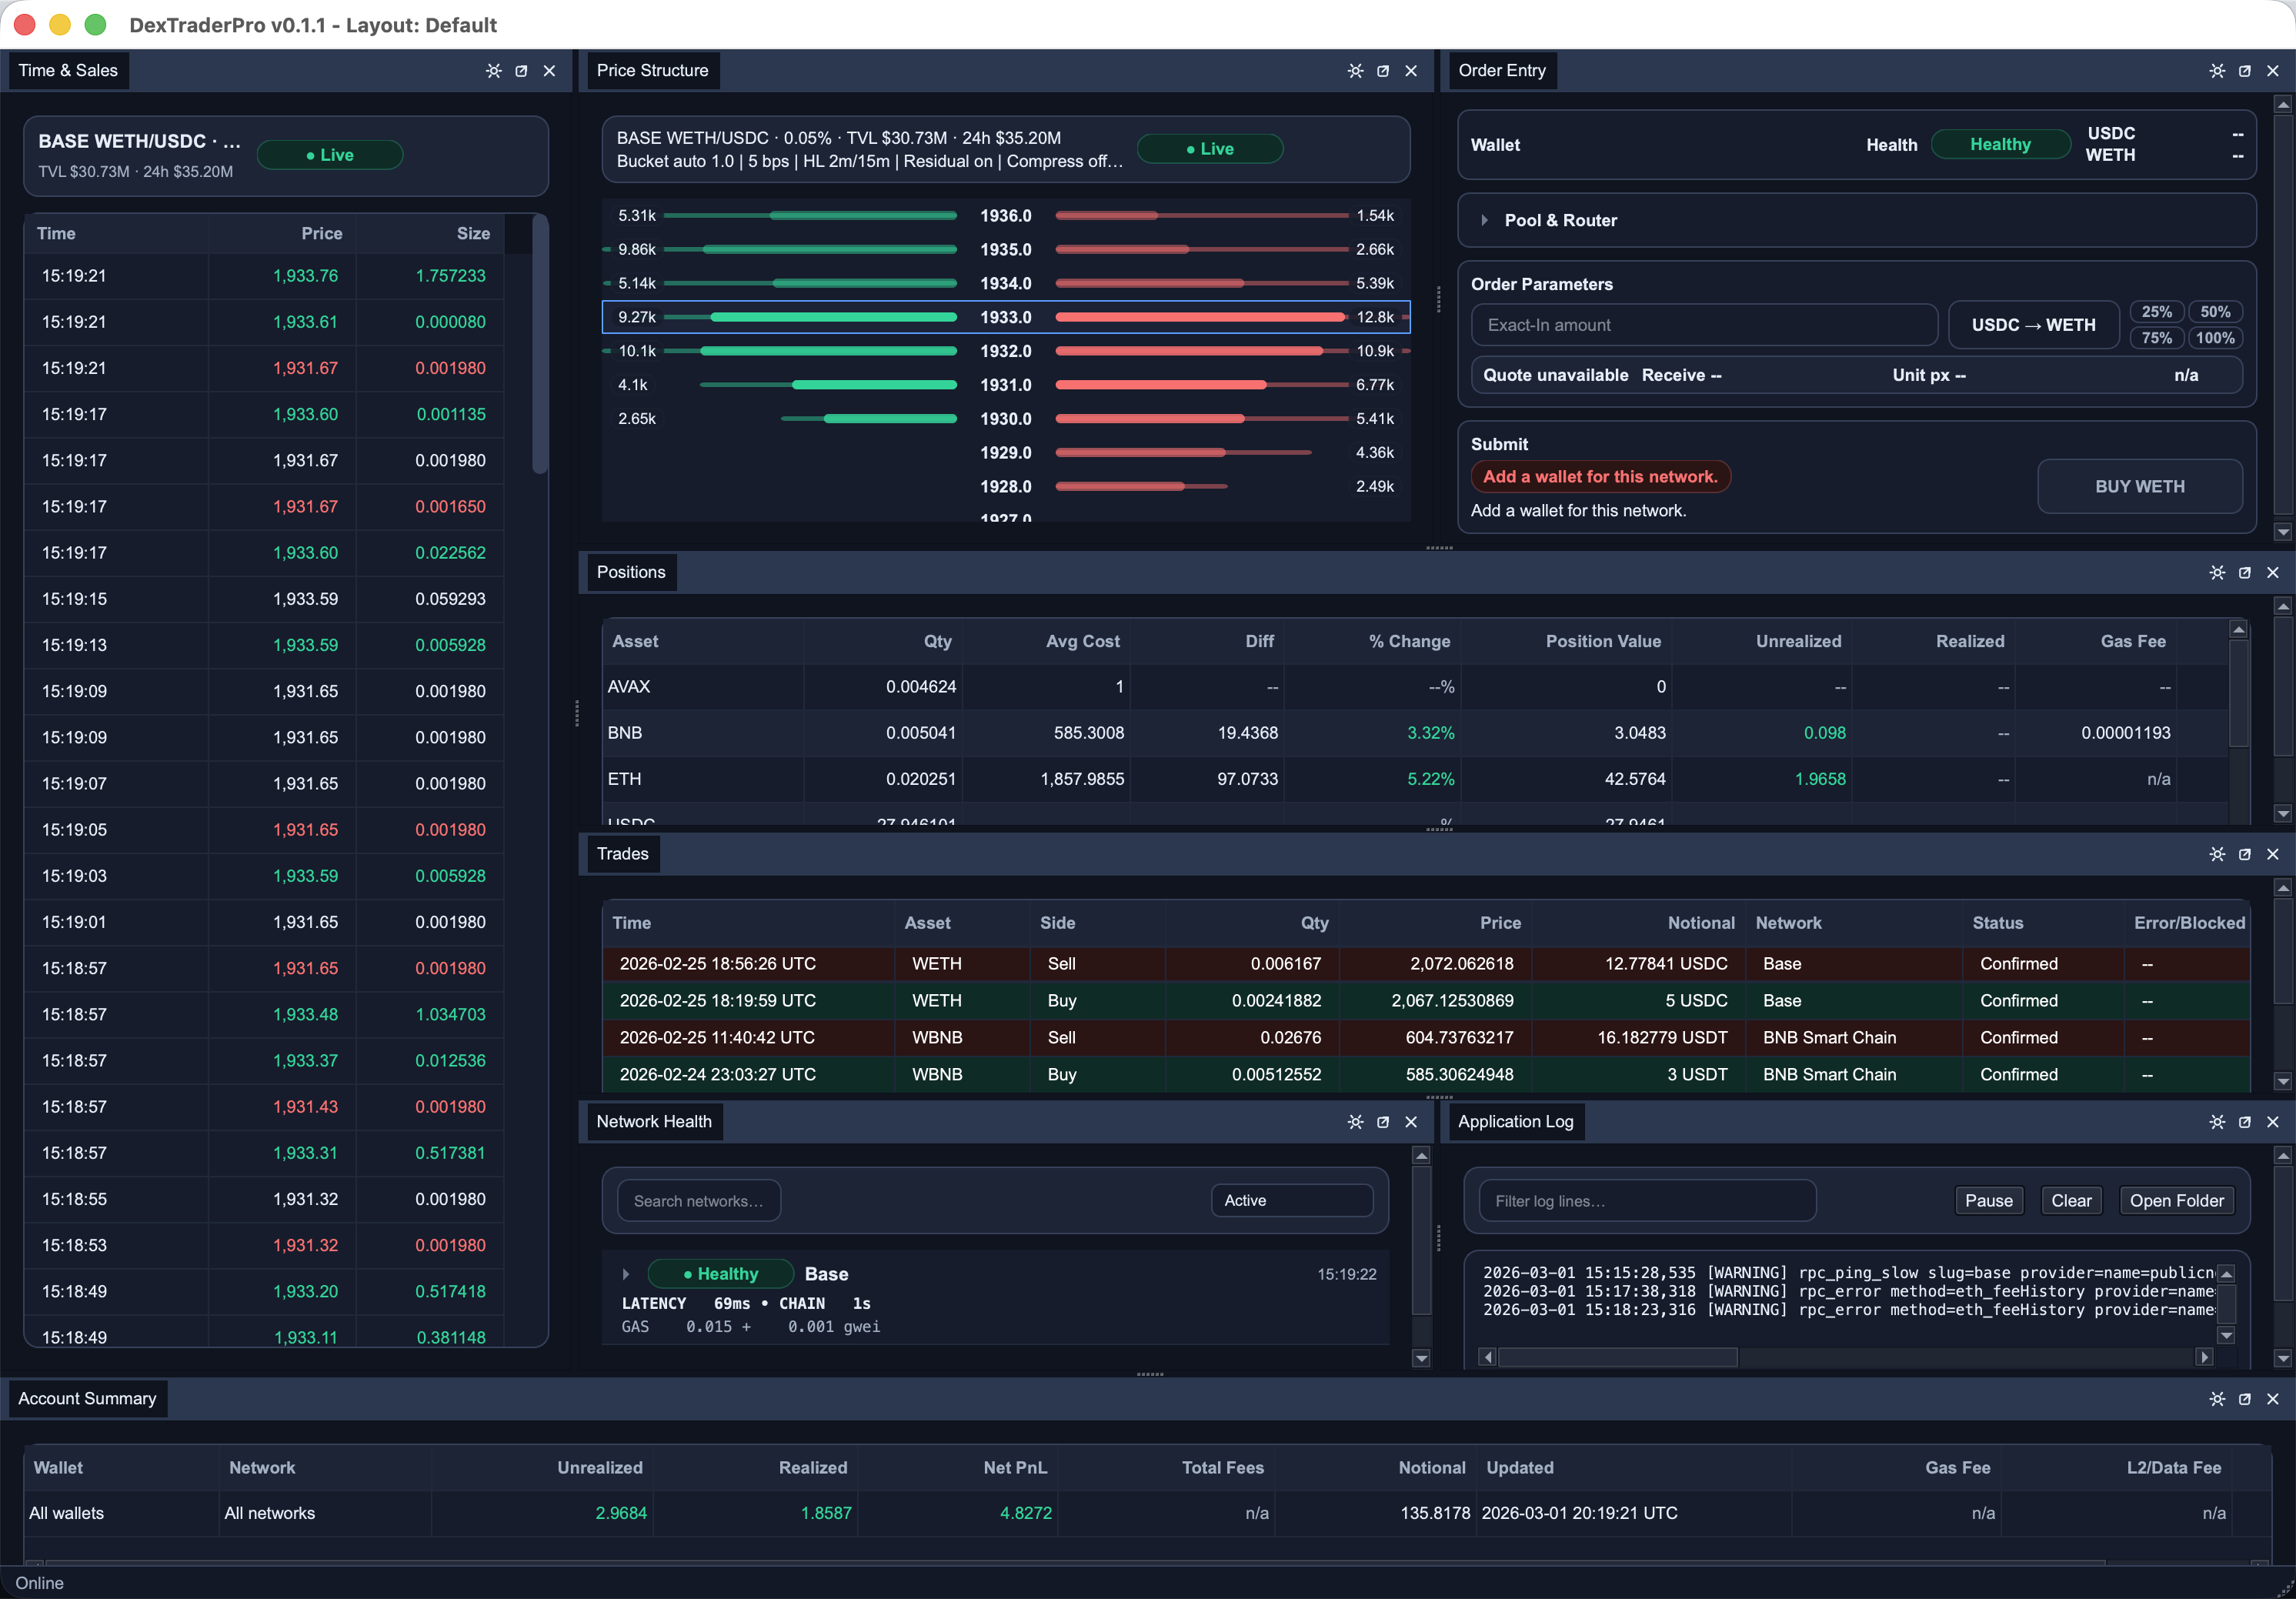
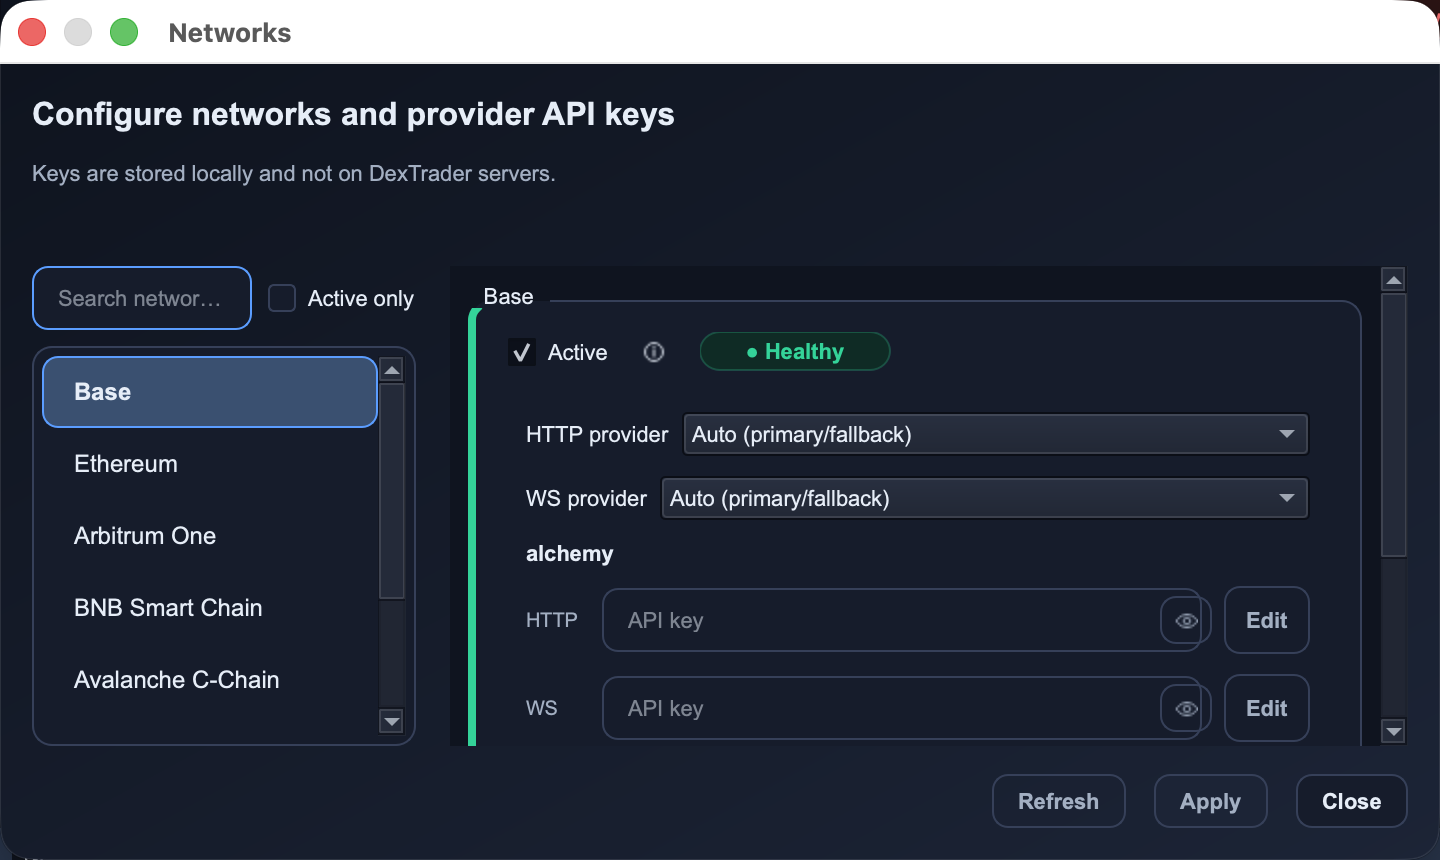
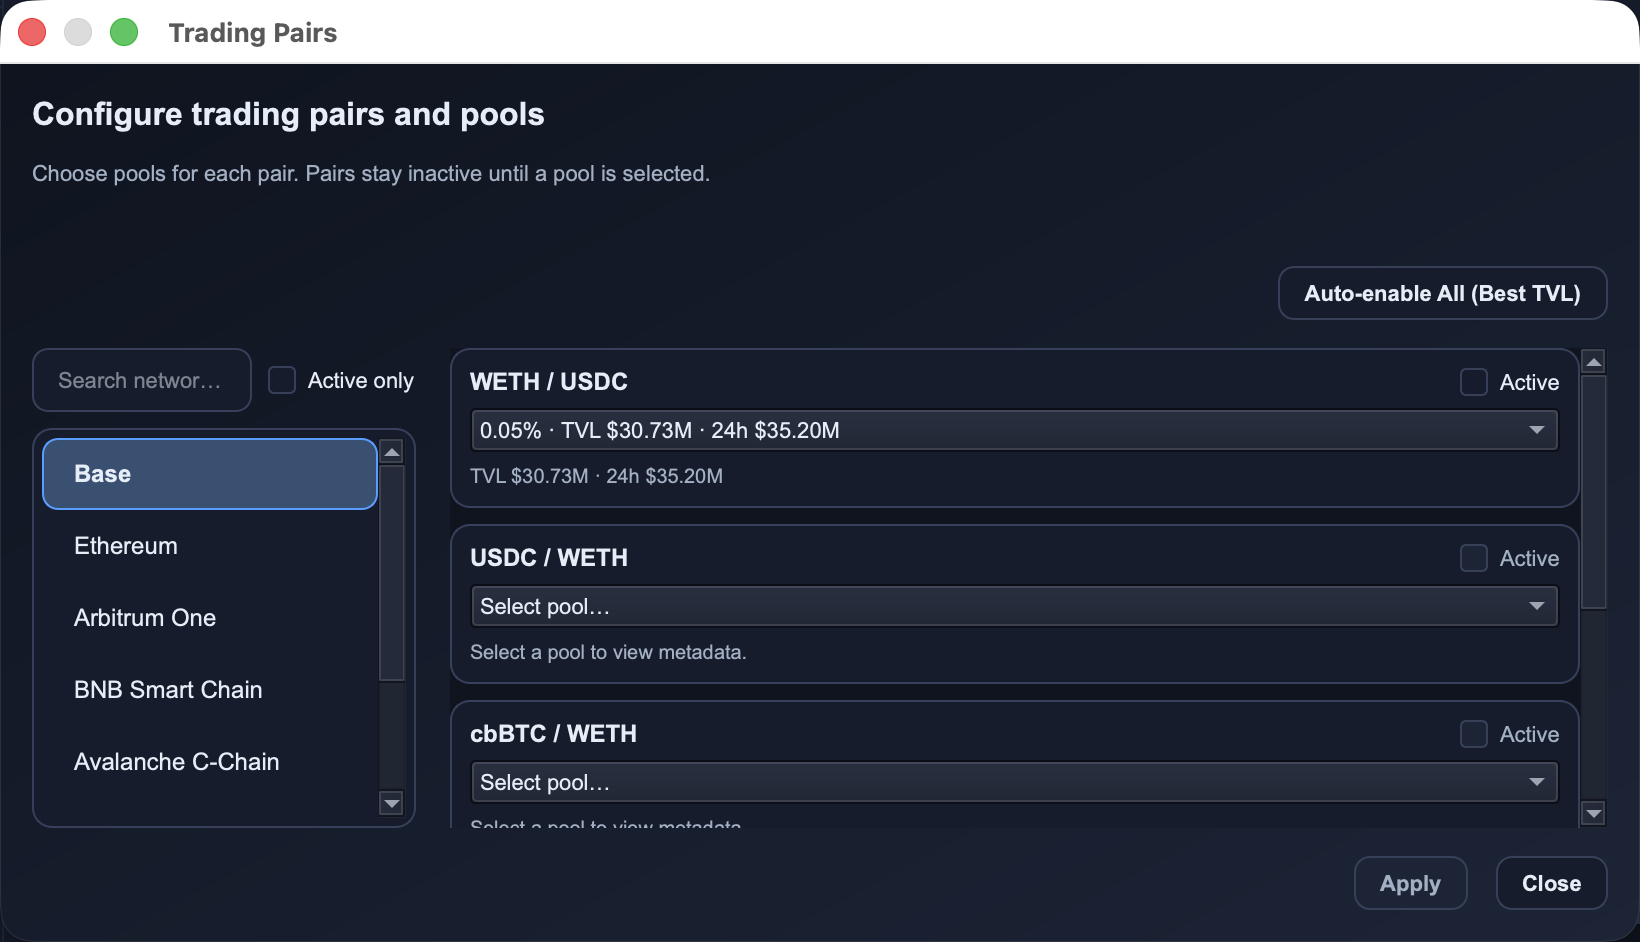
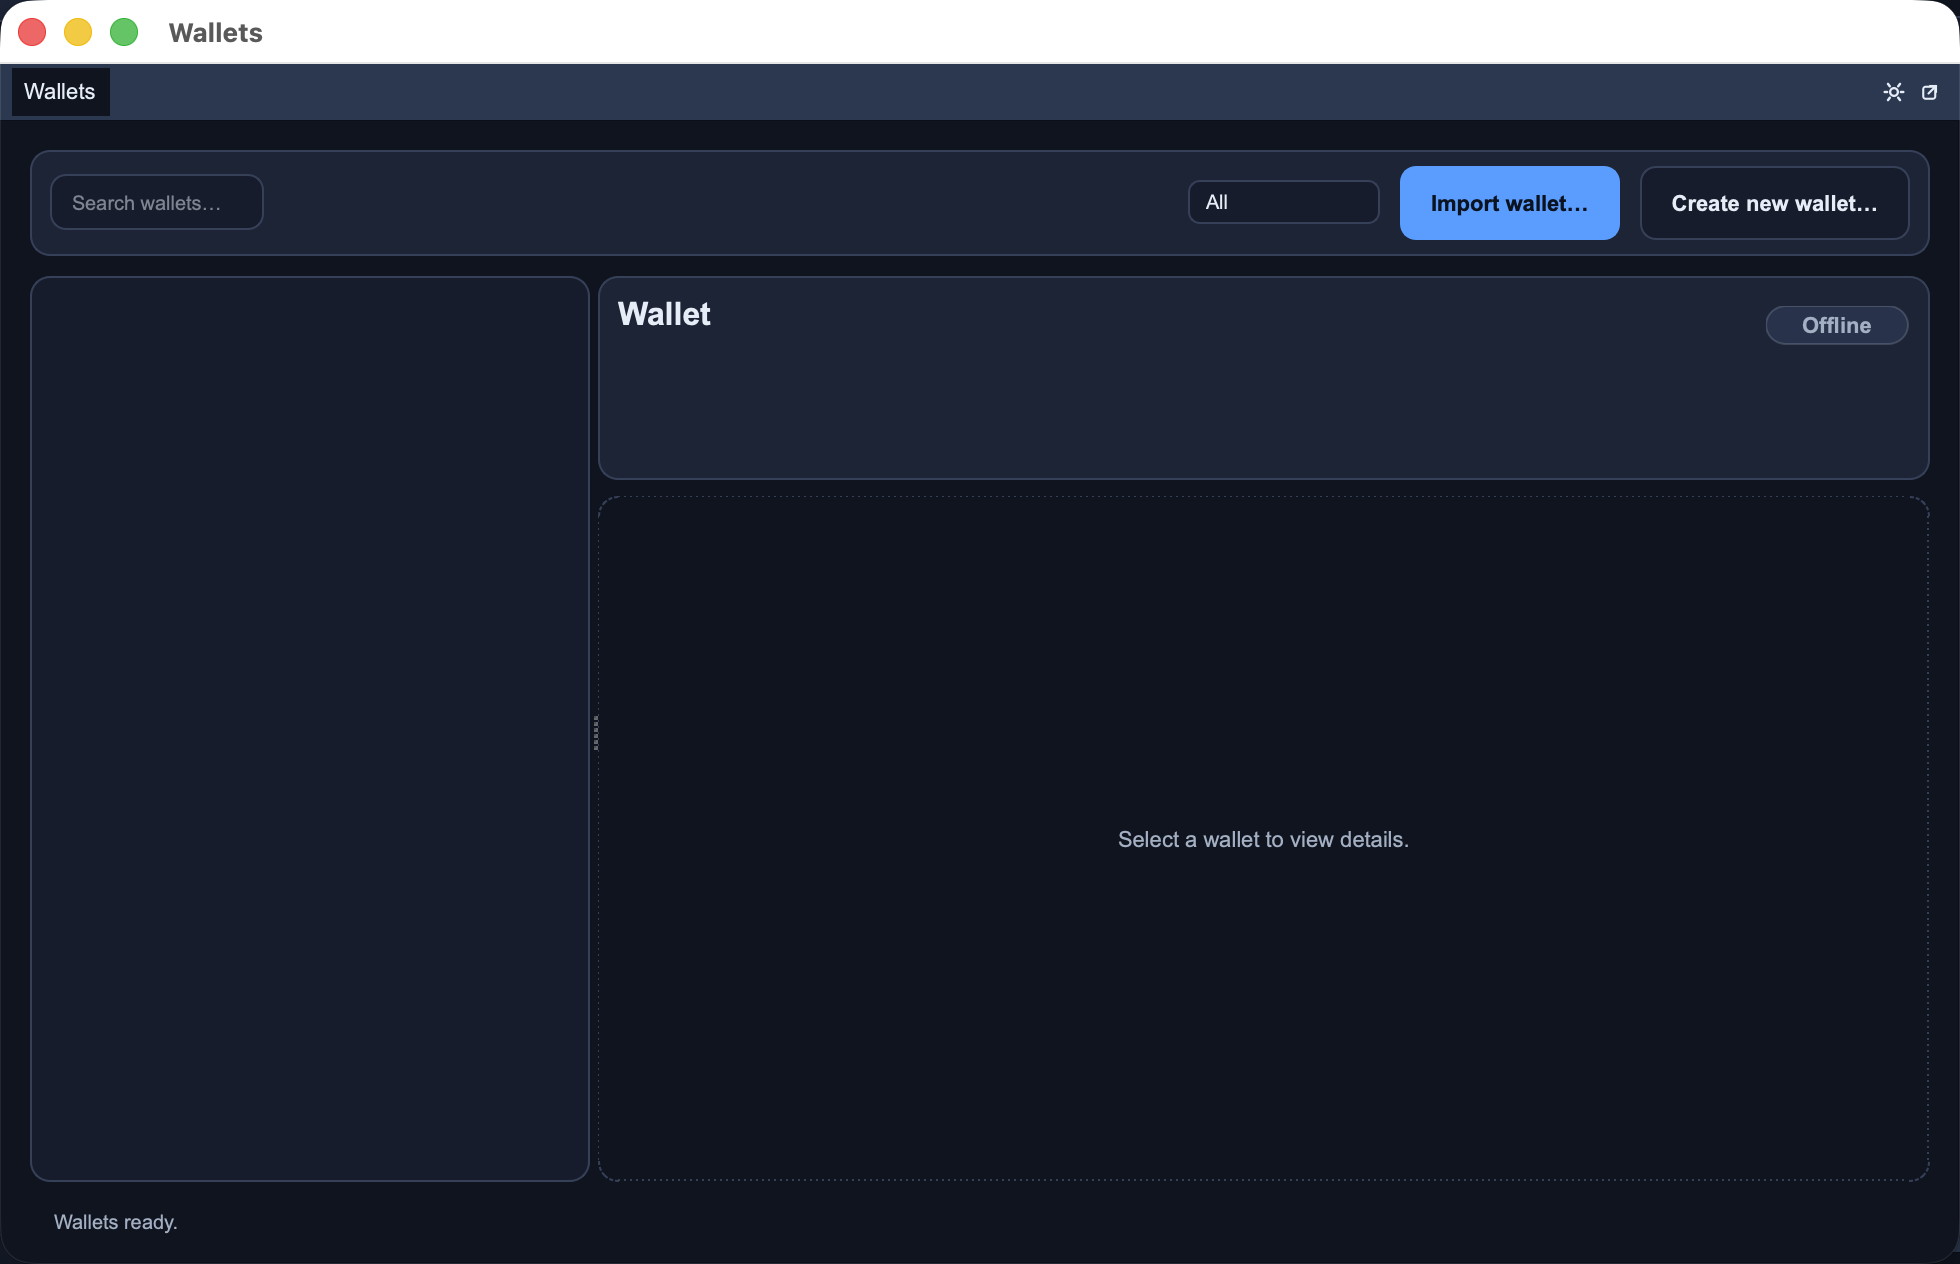
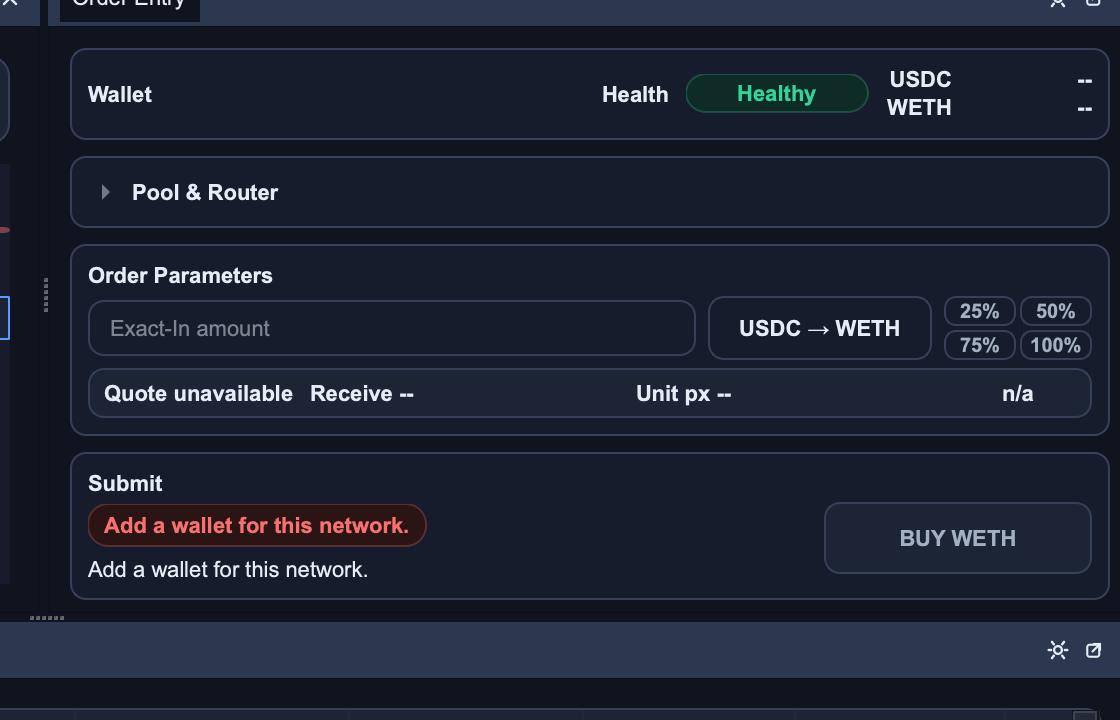
Follow this guided setup. Each step references screenshots so you can quickly confirm your screen and continue.

Estimated setup time: 15 to 20 minutes for first-time users.

Installer requires invite email + license key. No key yet? Join the waitlist.

Need checksums or full release notes? Open latest release.

Current alpha channel: macOS and Windows v0.1.4 installers are live.

Before you begin

  • RequiredDesktop: macOS or Windows.
  • RequiredWallet funded for gas + first test trade.
  • RequiredInvite/waitlist email for sign-in.
  • RequiredLicense key from invite email at first launch.
  • OptionalAlchemy key for more stable RPC.

Step 1 — Install and sign in

  1. Install the current build.

    Use the macOS or Windows download button above, then launch the app.

  2. Enter your license key (first launch).

    When prompted, paste the license key from your invite email to activate this device.

  3. Complete magic-link sign-in.

    Use the same invite email and complete the magic-link login flow.

  4. Confirm baseline UI.

    Your main window should resemble Figure 1 with core panels visible.

Figure 1: DexTraderPro full workstation layout with Time and Sales, Pricing Ladder, Order Entry, positions, and scanners.
Figure 1: Full workstation layout reference.

Step 2 — Configure networks and RPC providers

  1. Open network settings.

    Go to Setup -> Networks....

  2. Enable your trading chains.

    Turn on only the networks you intend to actively trade first, then click Apply.

  3. Optional: add Alchemy endpoints.

    Create a free account at dashboard.alchemy.com, then paste your HTTP/WS API keys per chain for better stability and click Apply.

  4. Save and verify health.

    Return to the workstation and confirm active chains report Healthy status in the Network Health panel.

Figure 2: Networks configuration window with active chain selection, provider options, and API key fields.
Figure 2: Networks setup and provider key configuration.

Step 3 — Enable pairs/pools and load market context

  1. Enable the pools you want to trade.

    Go to Setup -> Trading Pairs..., select your network, and enable the pools you plan to trade. As a shortcut, use Auto-enable All (Best TVL), then click Apply.

  2. Align your market windows.

    Set Time & Sales, Pricing Ladder, and Chart to the same network and active pair/pool context.

  3. Check live tape activity.

    Confirm Time & Sales is printing live trades for that exact pair/pool before moving to order entry.

Figure 3: Trading pairs window with pair rows, pool selectors, and active toggles.
Figure 3: Activate pairs and select pools before trading.

Step 4 — Create or import your wallet

  1. Open Wallets.

    Go to Setup -> Wallets.

  2. Create new or import existing.

    Choose Create new wallet... for a new wallet, or Import wallet... for an existing one.

  3. Secure your credentials.

    If you create a wallet, complete the backup step before continuing. If you import, verify the expected address appears in Wallets.

Figure 4: Wallets window with Import wallet and Create new wallet actions.
Figure 4: Create or import wallet before connecting order entry.

Step 5 — Connect wallet and verify order entry

  1. Connect wallet for the target chain.

    Select your wallet for the target chain, then verify address, chain, and available gas balance before preparing an order.

  2. Inspect order-entry readiness.

    Check quote availability, health status, and submission readiness in the order panel.

  3. Submit a small validation order.

    Track lifecycle states from submit to final outcome using Figure 5 as the status reference.

Figure 5: Order Entry panel showing wallet, quote state, order parameters, and submit section.
Figure 5: Order Entry readiness and submit workflow reference.

Before you place bigger orders

  • Confirm Time & Sales is updating for your active pair/pool.
  • Start with a small validation order and confirm expected order/trade updates.
  • If market data appears stale, wait for recovery before increasing size.

First-trade checklist

  • Correct chain selected for wallet and market/pool.
  • Pair/pool explicitly enabled in Trading Pairs.
  • Quote and health indicators are fresh/ready.
  • Gas balance covers approval + swap path if required.
  • Initial test size is intentionally small.

Troubleshooting

  • No pool options: verify the pair is enabled and pool is selected.
  • Offline/stale view: switch to a known active pool/network and re-check status.
  • Submit blocked: verify wallet, quote, and fee readiness in Order Entry.

If blocked, submit an issue and include logs/diagnostics.